Tonight Renee and I, along with several friends, checked out Arrogance at the Cat's Cradle. Arrogance is the king of the Triangle bands. There are probably 15 bands out there who would take exception with that statement. Arrogance formed way back when - '69, I think. They played together until 1983. They released 5 records, including Suddenly on Warner/Curb, plus The 5'11"Record long after the breakup.
They opened with "Not Unusal." That is one of my favorite Robert songs. Later, a great version of "Money'", but no "Open Windows." I have to say I miss the old days when they walked onstage to the whistling song, and closed with "Puff, The Magic Dragon."
There were a lot of geezers there. I'm not young by any means. I can't remember JFK's death, but I do remember RFK's. I would have been in the youngest 5% there, had so many people not brought their grandkids.
Sunday, August 24, 2008
Thursday, August 21, 2008
Attaching the Rubrail
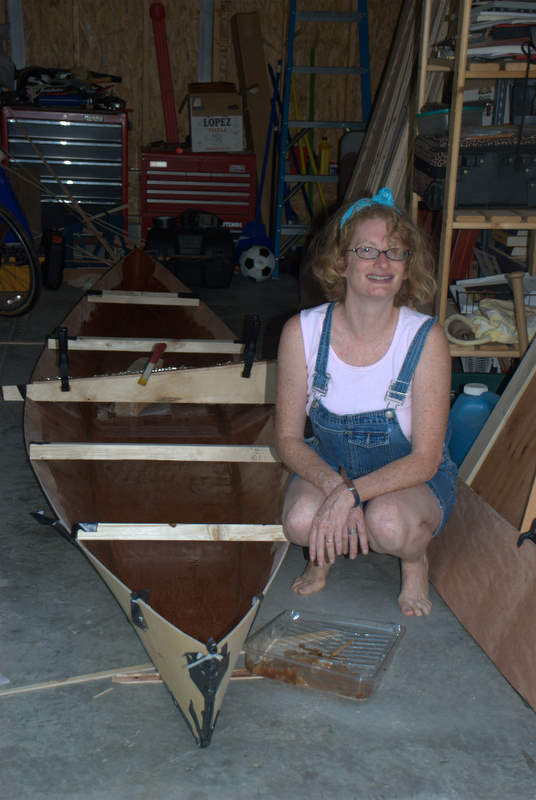
Laminating the rubrail is a several day process. The rubrail is made of three 1/4" thick by 1 1/2" wide plywood strips laminated to 3/4" thick. They are glued on one layer at a time with a glue made of epoxy and wood flour. You really need lots of clamps for even clamping pressure.
I don't have any 16 foot strips of plywood, of course, so my rubrail strips are 8 feet long. I will stagger my joints for strength and for fairness of the curve. On the last layer I will center the 8 foot strips on the sides and finish with 4 foot strips on either end.


I borrowed a few clamps to make 49 clamps total (thanks Rob and Carl). On my 16 foot canoe, that is 25 per side, more or less, or one clamp every 8". I glued on the first layer on both sides. It bends vertically more easily than you would expect. I used 10 ounces of epoxy for the putty to glue on 16 feet of rubrail.
After it set up, I noticed little waves in the rubrail. There were depressions at every clamp point. This picture shows it, although blurry. The canoe is longer than the depth of field.

I was afraid to do only one side at a time, to avoid pulling the canoe assymetrical. To try to correct the waves, I spread on the epoxy a little thicker and clamped over the high spot on the first strip. This helped some: it reduced the waviness by about half.
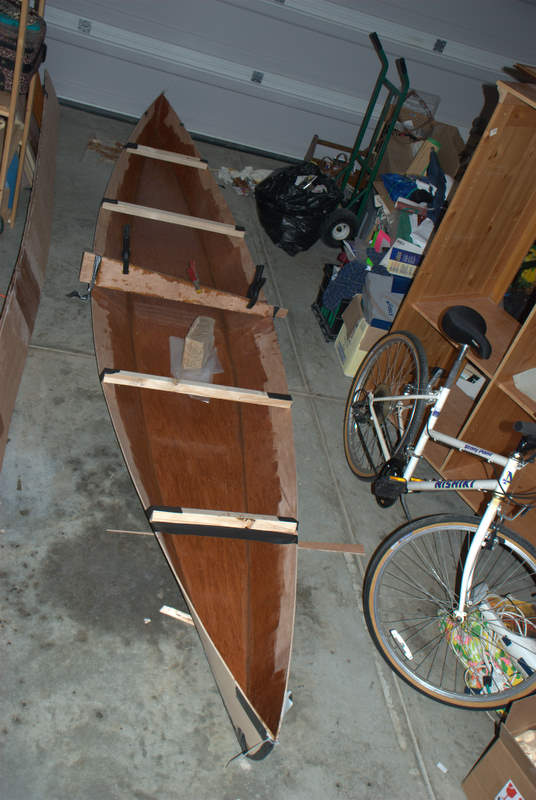
Since the 2 layers has made the hull stiff, I decided to go ahead and put the last layer on one side at a time so I could use all of the clamps. I used 44 clamps on each side - 1 every 4 1/2 inches. This is a much better spacing. I will make sure on future boats that I can clamp every 4 inches.

This is the finished rubrail, before shaping.

Sunday, August 10, 2008
Taping the joints outside
My goal for this session of work is to tape the outside joints with fiberglass and do as much of the epoxy work as possible wet on wet. I probably didn't say so earlier in this blog, but my real purpose in building this canoe is to learn for building a bigger boat. Having a canoe at the end is a fringe benefit.
I had seen few voids from the cut edges, so I investigated closely. I discovered tht I could push my thumb nail throught the veneer at these holes, across the panel, all of the way to the other edge. I have to fill these to prevent rotting, so I got out the Dremel and looked for discolored lines or snall voids at the edges. I routed through the veneer and first layer of the core. I will fill the slots with epoxy putty, and cover with fiberglass tape to replace the lost strength.


Last, I laid out and cut the fiberglass tape. Each piece was rolled like a scroll from each end to the middle, to make it easier to lay out, just line up in the center, and roll. I laid them out, labeled.

I started early doing the outside joints. The steps - prime the wood, fill the joints to make them smooth, and apply fiberglass tape. Priming the wood is easy enough. I used a foam roller.
I let the epoxy cure nearly an hour, then I mixed putty and filled in all gaps in the joints and all of the slots I cut to expose the voids. As soon as I finished puttying, I began taping. I taped the bow and stern (Which is which?), then all four chines. I used the scrap tape at the bow and stern between the chines to make fairing easier by providing a constant number of tape layers. I also used a little woven tape to strengthen the slots cut over the core gaps in the plywood, since the plywood was only one layer thick at those spots.
I let the tape cure awhile, until it set. Since I had time, I went ahead and filled in the weave of the biax tape with a thick wood flour/epoxy slurry. It was closer to putty on the vertical surfaces.
Working wet on wet is definitely the right way to do this. There is no sanding between steps, and that saves a lot of time.
Below, the canoe is all taped.

Friday, July 25, 2008
Flipping the canoe
I flipped the canoe over, and inspected the misalignment problem. It's easy enough to fix. My idea was to fill the depressions (4 of them) under the tape with epoxy/wood flour putty. fmiles on the forum suggested using strips of plywood bedded in putty as a filler less expensive than straight putty. I laid a strip of scrap plywood by the deepest spot, but it was too thick. But it was a great idea.
When I was butt splicing the panels together, I coated the bottom panels with leftover epoxy, so as not to waste it. These panels have little bend, so it didn't affect anything. But because it has cured, I have to sand for adhesion of the next layer.

I sanded quite a while, mostly smoothing down putty that squeezed through the joint from the inside. The putty spots are hard, jagged sandpaper-shredders. I prefer hand sanding: there is just something relaxing about it that quietens the mind and puts everything in perspective. I think I look forward to fairing. You can see in the picture how the 60 grit sandpaper has scratched up the smooth epoxy surface.
I spread epoxy putty in the depressed areas, as wide as the tape will cover. The idea was to build up the area under the tape level, and let fairing putty fill the space in between. 12 ounces of epoxy putty took care of the problem.
Unfortunately, in one area I took care of the problem too well. I built it a bout 1/32 inch too high. That would be a problem in fairing, and I certainly didn't want to sand through fiberglass tape. I knew this stuff is hard, but it hard to realize just how hard. 45 minutes of hard sanding by hand, with 3 paper changes, and I had it level. The high area was only about 6 square inches.
This is the result:

The upper panels
I began by removing the duct tape from the lower chines and bow. It all looked good, except for an area about 18-24" long where the panels were misaligned. As you can see, it is about 1/4" at its worst. This is just something to fix. An asymmetrical depression on the bottom will probably affect tracking.

I am not going to make the mistake of relying on the duct tape again. I drilled every 6-12" and used tie-wraps. The tie-wraps pulled the panels into alignment everywhere except about 6" form the ends. The upper panels wanted to pull inside the chine panels at those points, so I forced them into alignment with blocks. There is a trick using dowels or pipe under the tie-wraps. I'll do that next time.
Next I primed the area with epoxy, and let it sit a little while. Then I spot welded with putty between the stitches. In a few places I covered a tie-wrap with putty by accident, but later discovered that the epoxy won't bond to the nylon so I just pulled them out after cure. Of course, the upper chine is easier to fillet than the lower chine, being flatter.
After the spots were cured, I removed the tie-wraps, and made the fillets. I left the tie-wraps in the bow, and put the bow fillets in in 3 layers, shaping again with the back of a spoon.
I taped the joints while the fillets were tacky. Where I misplaced the tape, reseating it distorted the tape a little.
After the taping, this is how it looked. Notice, also, the panels cut and ready for the D4 on top of the entertainment center.

Thursday, July 17, 2008
Attaching the chine panels
I set aside, or tied to set aside, a weekend for assembling the canoe. The plan was to start early Saturday morning, tape the chine panels to the bottom, prime the edges, wait, apply putty, wait, fiberglass, sleep, get up early Sunday, and repeat with the upper panels. Well, it was a nice plan.
Now for reality. Other responsibilities came up. But I did get a respectable amount done. First order of business - tape the seams. I tried to avoid using stitches for simplicity (I didn't want to fill holes). I used 3M low residue duct tape to tape the seams. It wasn't nearly as easy as it looked in the free canoe plans. Those tutorials were produced by professionals, and this is my first project. Quickly, what I learned:

The hardest part to epoxy was the bow and stern. There is not adequate room to work. After trying to putty that narrow angle with a squeegee (messy) and my gloved fingers (more messy), I discovered the back and tip of a plastic spoon did an amazing job. I really dread sanding the mess I made in that area.

The next morning, I fiberglassed the inside bottom to chine panel joints and bow and stern joints. I put a thin coat of epoxy over the putty, and let it cure for an hour until sticky. While it was curing, I prepared the fiberglass tape by finding the center, and rolling to the center from each end, like a scroll. I carefully laid the fiberglass at the center joint, then rolled each way, lightly stretching the fiberglass as I went. The tackiness of the partially cured epoxy kept the tape in place. It also made realigning the tape a little messy. It would distort the tape a little to lift it.
I wet out the fiberglass using a 4" foam roller. It was a cool morning (for North Carolina), and everything went well. The Marinepoxy wet out the fiberglass easily. I used 21 ounces of epoxy (seven 3 ounce batches) to wet out 34' of biaxial tape. I thought that I did a good job wetting out the tape without over saturating it, but maybe I did too good of a job - about 15% of the tape was a little epoxy starved. It is fixable, though.
It looks like an olive boat now.

Next, the upper panels.
Now for reality. Other responsibilities came up. But I did get a respectable amount done. First order of business - tape the seams. I tried to avoid using stitches for simplicity (I didn't want to fill holes). I used 3M low residue duct tape to tape the seams. It wasn't nearly as easy as it looked in the free canoe plans. Those tutorials were produced by professionals, and this is my first project. Quickly, what I learned:
- Start with short lengths of tape spaced 12" to 18" apart.
- After the shape is close, tape the entire seam, pulling it into shape.
- Most important, stitches are necessary. I used one stitch at the top of the chine panel on the bow and stern. I wish I had used them every 12 or 18 inches, closer in tight bends.
The hardest part to epoxy was the bow and stern. There is not adequate room to work. After trying to putty that narrow angle with a squeegee (messy) and my gloved fingers (more messy), I discovered the back and tip of a plastic spoon did an amazing job. I really dread sanding the mess I made in that area.

The next morning, I fiberglassed the inside bottom to chine panel joints and bow and stern joints. I put a thin coat of epoxy over the putty, and let it cure for an hour until sticky. While it was curing, I prepared the fiberglass tape by finding the center, and rolling to the center from each end, like a scroll. I carefully laid the fiberglass at the center joint, then rolled each way, lightly stretching the fiberglass as I went. The tackiness of the partially cured epoxy kept the tape in place. It also made realigning the tape a little messy. It would distort the tape a little to lift it.
I wet out the fiberglass using a 4" foam roller. It was a cool morning (for North Carolina), and everything went well. The Marinepoxy wet out the fiberglass easily. I used 21 ounces of epoxy (seven 3 ounce batches) to wet out 34' of biaxial tape. I thought that I did a good job wetting out the tape without over saturating it, but maybe I did too good of a job - about 15% of the tape was a little epoxy starved. It is fixable, though.
It looks like an olive boat now.
Next, the upper panels.
Tuesday, July 15, 2008
Cutting out the canoe panels
Thanks to a suggestion on the bateau forums (on another boat to another person) by a poster whose name I cannot remember, I decided to cut out all of the panels at the same time. Did I say thanks for that suggestion? It worked great. To do that, I had to nest the panels differently (sorry Jacques), and use four sheets of plywood instead of three. It won't go to waste, but if I were using $50 okoume instead of $11 lauan, I might stick with the original nesting.
The original nesting had two upper panels and a center panel on two sheets, and all four chine panels on the other sheet. I drew one upper panel, a center panel, and a chine panel on one sheet. I clamped four sheets of plywood in a stack, and cut all four of the chine panels and all four of the upper panels at once. Then I removed the bottom two sheets of plywood, and cut out the two center panels. As I cut the panels out, I kept the sets clamped together, and smoothed my rough spots with a belt sander. Ten panels for the price of three cuts. That's great, but the real benefit came next, when I glued up the 16' long panels.
The butt joints between panels were easy. All went just as the directions said, except that some of the pieces developed a twist or lift and did not want to mate willingly. I learned to hold the pieces flat the best I can, force a little putty between the ends, apply the fiberglass (which wet out very easily with the Marinepoxy), cover the joint with polyethelene sheeting, and weight with a 20 pound rock on top of a piece of 1/2" plywood to evenly distribute the weight. Wait 12 hours, flip the panels carefully, and repeat on the other side, no weight necessary.
After gluing I checked for symmetry by stacking the two upper panels and the two chine panels. I could not feel a difference with my fingertips. Once again, thanks to whoever made the suggestion to cut mirror image panels at the same time.
Subscribe to:
Posts (Atom)